A regular client brought in her laptop with regular problem – lines across the screen. Apparently her children had used it, and the lines had magically appeared – no-one would admit to any accidents with the machine. We connected the machine up to an external monitor to check that there were no other issues, which confirmed that the only damage was the broken screen.
Basically, there is no way to repair an LED or LCD screen which is physically broken like this. You HAVE to replace it.
The skill level for this type of project is moderate. If the sight of a screwdriver makes you feel queasy, find a local IT company to do this for you; it’ll be worth it for the confidence that they won’t destroy your laptop. If you’re in Utah, we’d recommend KP Direction. But we’re biased!
If you want to do it yourself, it’s very possible. If you take your time, don’t force any connections (in or out), and have a minimal set of tools, you shouldn’t have any issues.
We decided to source the replacement screen from laptopscreen.com, as we’ve used them successfully before, prices are good, and delivery is so fast I think they have their own time machine! (ordered on a Monday evening, installed on a Thursday afternoon). Look out for their advert for screen cleaning fluid.. it’s hilarious!
Putting in our laptops details showed that there were several different screens available to us, using two different types of edge connector. So the first requirement is to remove the screen – not all the way, but enough that we can identify the specific screen we will need. Nothing worse than receiving the wrong screen for your repair…
DISCONNECT THE LAPTOP POWER SUPPLY and REMOVE THE BATTERY BEFORE STARTING WORK!
1. Remove the square black dots covering the bezel screws
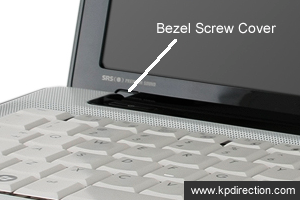 There are two of these, at the lower left and right-hand corners of the screen, next to the hinge. A sharp knife is perfect for popping them out without any damage.
2. Remove the two bezel screws
Using a small screwdriver, remove the two silver screws (one at each lower corner), and keep them safe, together with their black squares.
3. Now we need to remove the bezel. Be VERY careful at this point – it’s just snapped into place, and it’s pretty easy to break the connectors. Ideally, we want to put the laptop back into the state that we got it (except that afterwards, it would be working, of course!).
We use one of these – it’s a little plastic tool sold for breaking apart iPods to replace the battery. Plastic is the ideal material for this tool, as metal tends to leave nicks and cuts in the bezel. If you don’t have something similar to this, a heavy guitar pick will work as well.
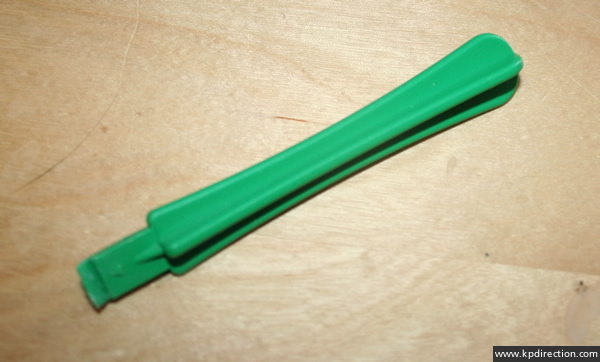
Start on the left-hand side of the bezel. Slip the tool between the LCD screen and the bezel – just where the rubber bumper is, and twist it. There will be a crack as the clip releases.
Work up to the top left corner, along the top, and down the right-hand side. Unclip the middle of the bottom bezel rail, and then lift the bezel forward to remove it. There are no electronic connections to the bezel.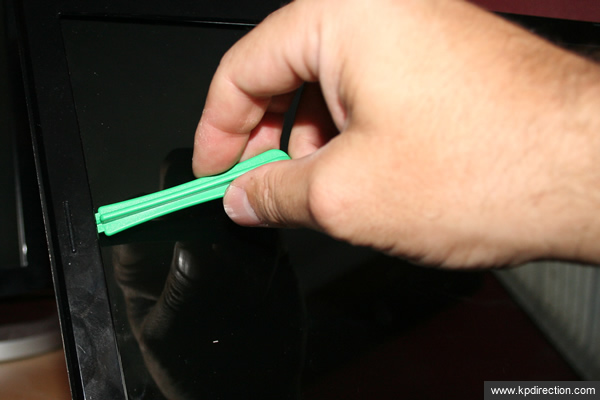
4. We can see the LCD screen itself now. Disconnect the wire on the left-hand side of the webcam. Don’t pull the wire – instead, ease out the white connector with a sharp blade. You don’t want to break that wire! 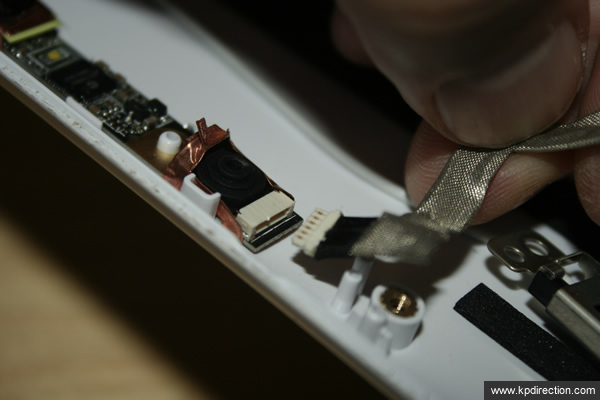
5. Release the LED screen from the rear cover of the computer by removing the black screw at each corner.
Note that the black screw is on the inside of the two hinges at the bottom of the screen
6. The back cover will (gently) fall down, and you can see the back of the LCD screen. Note that our DV4 is white, so the back of the screen is covered with Aluminum foil to prevent bleed-through of light (not sure if this is the same on the black models). You should peel this back so that you can see the format of the connectors on the screen.
7. Visit laptopscreen.com, put in the make and model number of your laptop, and find the best fit. Buy the correct part.
8. It will take a few days for delivery, so gently fold the laptop back up and keep it (and the screws etc.) in a safe place.
9. One thing we’ve noticed with Laptop Screen – they package their screens *really* well. Here’s a photo of the package the screen arrived in; inside the cardboard was a bubblewrap envelope, with the screen in. We’ve never received a broken screen. 
10. Once the new screen arrives, compare it to the broken screen. It may look cosmetically different, as this example does, but you MUST ensure that it’s the same physical size and that the connectors match.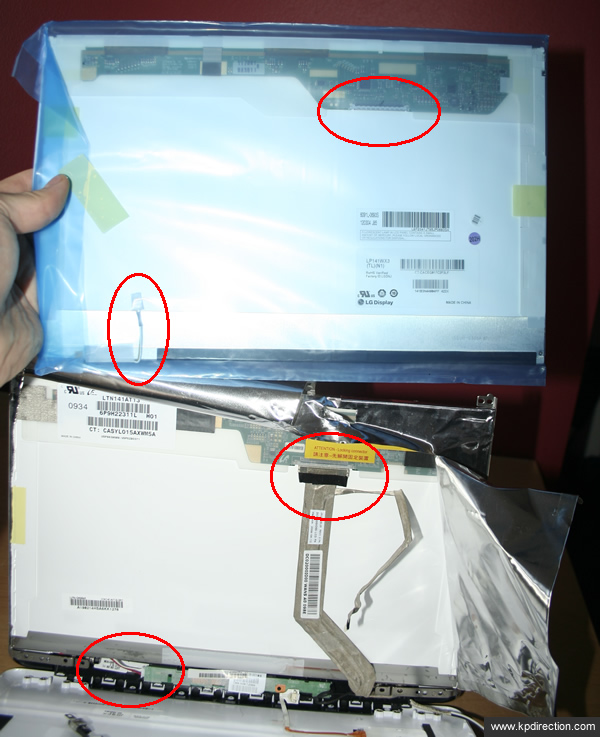
11. They do match! Great!
12. Gently remove the cable to the webcam if you haven’t already done that (if it won’t stick later on the new screen, just use a bit of scotch tape or similar)
13. Gently unplug the video connector from the screen by removing the clear tape. The connector is designed so that it comes out vertically downwards. Hold the black reinforcment tape when pulling this connector out.
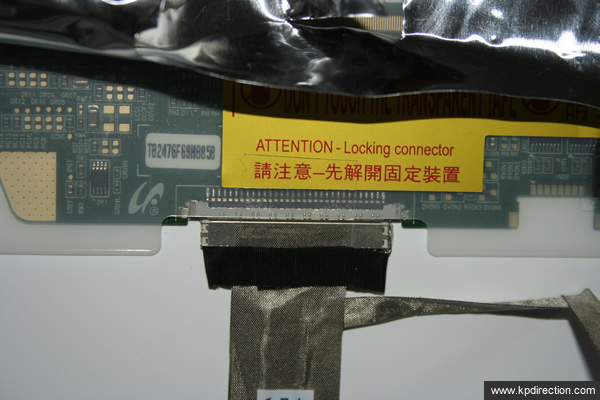
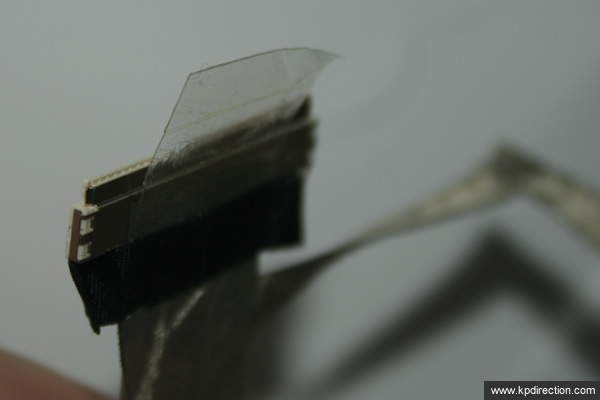
14. LCD monitors have a backlight connector in addition to the screen connector. On this model, it’s at the bottom left of the screen (connectors facing you). 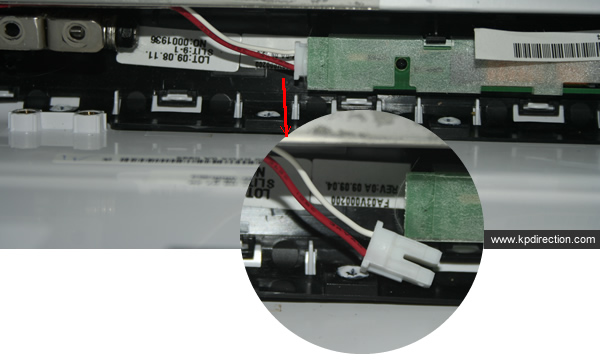
15. With the video and backlight connectors removed, we can separate the old LCD from the hinge rails – four screws on each side. 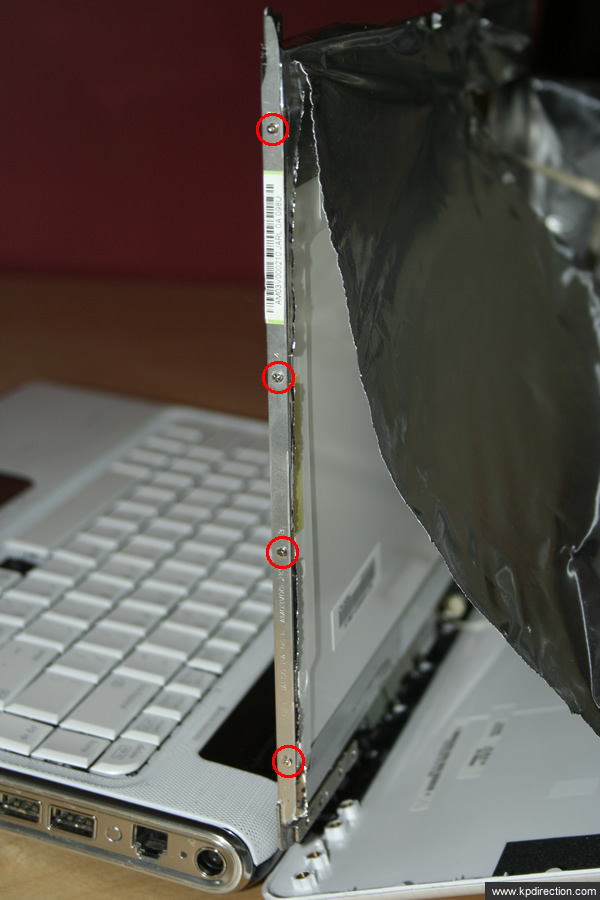
16. Replacement is pertty much the reverse of removal, as they say. Some things to be aware of; The new LCD is fragile. If an area says ‘Do not touch’, then guess what – keep your greasy fingers off it! The screen comes with a plastic protector – make sure you don’t drive any screws through it, as you need to take that off before you put the bezel in place. But keep it on as long as possible, so your new screen stays pristine. An attractive assistant is useful to hold the screen in place while you’re trying to connect the hinge rails to the new panel.
17. On the lid of most HP models is a silly illuminated logo. We need to stop this from bleeding through to the display (yes, it happens!). To do that, we can either replace the aluminum foil that was on the old screen (metal duct tape is great for fixing this in place), or we can just slap some duct tape (or other opaque material) over the logo light – see the red circle in the following image. Do it on the INSIDE of the lid!
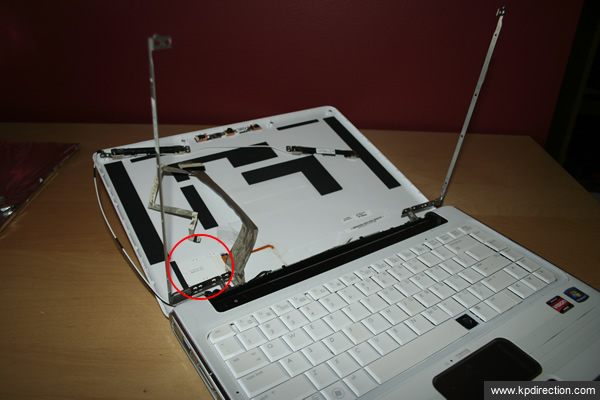
18. Don’t forget to reconnect the webcam, and ensure that the aerial wire on the left runs neatly up the side of the new screen.
19. Test the screen before you snap the bezel back into place. If all is OK, put the bezel on, and you’re back with a working laptop!
